/*auto readmore*/ /*auto readmore*/ /* an hien script*/ // an hien password /*an hien ma chuong trinh cong tru */ /*Scrollbox thanh cuon*/ /***Nhung CODE***/ /* dòng xanh dòng trắng */ /* https://cdnjs.com/libraries/prism lay thu vien, can vao ten file ma goi 1. copy link vao vi du:prism-python.min.js 2. ten ngon nua la python */ /*=== New posts ===*/ /*header slider*/ /*=== bai viet lien quan===*/ /*===tabcode===*/
Showing posts with label Python. Show all posts

Automation - Convert .xls To .XLSX / Chuyển Đổi Excel 97-2003 (.xls) Sang Excel 2010-2013-2016... (.xlsx)

Hiện tại có một số loại virus núp bóng marco trên excel để thực hiện các hành động phá hoại dữ liệu trên máy tính. Với Excel 79-2003 (.xls) macro có thể chạy trên định dạng này. Để giảm thiểu các macro có hại hoạt động và phá hủy dữ liệu, các bạn có thể save sang định dạng Excel 2010-2013-2016...(.xlsX), tuy nhiên với số lượng lớn file thì việc làm rất mất thời gian. Nên chúng tôi đã viết script để chuyển đổi hàng loạt các file với dạng .xls sang dạng .xlsX chia sẽ các bạn tham khảo.


Ý TƯỞNG THỰC HIỆN

Kiểm tra các file tại đường dẫn đưa vào nếu là excel 97-2003 (.xls) thì:

  • Thực hiện chuyển các file này vào file nén .ZIP nhằm mục đích đề phòng trong quá trình chuyển đổi nội bị lỗi nội dung...
  • Thực hiện chuyển đổi .xls sang .xlsx
  • Ghi lại nhật ký (ghi log) các file đã chuyển thành công
  • Thực hiện xóa file .xls


CODE:

import xlwings as xw
import os
from fnmatch import fnmatch
# https://stackoverflow.com/questions/2909975/python-list-directory-subdirectory-and-files
from datetime import datetime
# datetime object containing current date and time

import zipfile

now = datetime.now()
dt_str3 = now.strftime("%Y-%b-%d_%H-%M-%S")

'''
nén file
'''
def add_tozip (path,file_name):
	with zipfile.ZipFile(rf"{path}\{dt_str3}_XLS_KHONG_DUNG.zip", "a") as zipf:
	    source_path = rf"{path}\{file_name}" 
	    destination = rf"{file_name}"
	    zipf.write(source_path, destination)	

# xóa file
def del_file(path,file_name): 
	os.remove(rf"{path}\{file_name}")

# ghi log
def write_log(path,file_name):
	f = open(rf"{path}\{dt_str3}.txt","a") 
	f.write(rf"{path}\\")
	f.write(rf"{file_name}")
	f.write("\n")
	f.flush() # thực hiện ghi nội dung vào file
	f.close()
	print (f'File"{path}\{file_name}" DA DUOC chuyen sang dinh dang moi .XLSX')

# thực hiện save sang dạng mới
def save_as(path,file_name):
	add_tozip (path,file_name) # nen file
	wb1 = xw.Book(rf"{path}\{file_name}")
	file_name = file_name.replace(".xls","_FIXED.xlsx")	    # XÓA .XLS
	wb1.save(rf"{path}\{file_name}")	
	wb1.close()

	file_name = file_name.replace("_FIXED.xlsx",".xls") # đổi lại thành .xls nhằm mục đích ghi log và xóa file .xls
	
	write_log(path,rf"{file_name}")
	del_file(path,file_name)
	

# nếu lấy danh sách file trong folder thì dùng hàm này (không lấy trong sub được)
def getfiles(path_dir): 
	dir_list = os.listdir(path_dir)
	return dir_list


xw.App(add_book=False)
xw.App(visible=False)
path = input('Dan duong dan vao: ')
#path = r'C:\Users\khanhvc\Downloads\Da'
'''
lst_files = getfiles(path)
# không lấy file trong subfolder
for file_name in lst_files:
	# print (x)
	if file_name.endswith('.xls'):
		save_as(path,rf"{file_name}")
'''
for path, subdirs, files in os.walk(path):
    for file_name in files:
        if fnmatch(file_name, "*.xls"):
        	save_as(path,rf"{file_name}")
            # print(os.path.join(path, name))


Hướng dẫn cho các bạn chưa biết python: 

  • Tải python về cài đặt
  • Vào run -> cmd -> enter gõ  pip install xlwings -> enter (cài đặt thư viện)
  • Copy toàn bộ nội dung code dán vào notepad lưu thành file .py. Ví dụ: c:\python\vidu.py
  • Vào run -> cmd -> enter gõ cd  c:\python -> enter -> python  vidu.py -> enter  (thực thi file .py)
  • Dán/nhập vào đường dẫn chứa các file .xls (chỉ cần folder cha, chương trình sẽ tự động tìm tìm trong subfolder)  Ví dụ: D:\khanh\congviec


Xong!

Lập Trình Python Cho Excel/Python For Excel #007 - Chèn/Tách/Gộp Cột

NỘI DUNG:

Mở file "BangDuLieu_ngaunhien.xlsx" là thực hiện:

1. Tách cột B (Full Name) thành 2 cột Last Name và First Name

2. Gộp 2 cột Last Name (cột C) và First Name (cột D) thành Cột New Full Name (cột E)

3. Tách cột B (Full Name) thành 2 cột Last Name 2 và First Name 2 (Viết theo kiểu tìm hàng cuối cùng tự động)

THỰC HIỆN:

1. Tách cột B (Full Name) thành 2 cột Last Name và First Name

Code:

# === Tách cột
import xlwings as xw

wb = xw.Book(r"C:\tmp\BangDuLieu_ngaunhien.xlsx")
sht = wb.sheets.active

# === tách first name, last name
sht["C:D"].insert()
sht["C2:D2"].value = ["First Name", "Last Name"]

full_names = sht["B3:B11"].value
first_names =[]
last_names=[]

for full_name in full_names:
    # full_name = sht["D4"].value
    list_fullname = full_name.split(" ") # chuyển về list, căn cứ vào dấu khoảng trắng
    list_firstname = list_fullname[:-1] # lấy từ đầu cho đến phần tử gần cuối.
    first_names.append(" ".join(list_firstname))
    list_lastname = list_fullname[-1] # lấy phần tử cuối cùng
    last_names.append(list_lastname)
sht["C3"].options(transpose=True).value = first_names
sht["D3"].options(transpose=True).value = last_names


2. Gộp 2 cột Last Name (cột C) và First Name (cột D) thành Cột New Full Name (cột E)

Code:

# === Tách cột, gộp cột
import xlwings as xw

wb = xw.Book(r"C:\tmp\BangDuLieu_ngaunhien.xlsx")
sht = wb.sheets.active

# === tách first name, last name
sht["C:D"].insert()
sht["C2:D2"].value = ["First Name", "Last Name"]

full_names = sht["B3:B11"].value
first_names =[]
last_names=[]

for full_name in full_names:
    # full_name = sht["D4"].value
    list_fullname = full_name.split(" ") # chuyển về list, căn cứ vào dấu khoảng trắng
    list_firstname = list_fullname[:-1] # lấy từ đầu cho đến phần tử gần cuối.
    first_names.append(" ".join(list_firstname))
    list_lastname = list_fullname[-1] # lấy phần tử cuối cùng
    last_names.append(list_lastname)
sht["C3"].options(transpose=True).value = first_names
sht["D3"].options(transpose=True).value = last_names

# === gộp cột 
sht["E:E"].insert()
sht["E2"].value = "New Full Name"
list_fullname= sht ["C3:D11"].value
list_fullname_join =[]
for fn in list_fullname:
    list_fullname_join.append(" ".join(fn))
### HOẶC
# list_fullname_join = [" ".join(fn) for fn in list_fullname] 

sht["E3"].options(transpose=True).value = list_fullname_join


3. Tách cột B (Full Name) thành 2 cột Last Name 2 và First Name 2 (Viết theo kiểu tìm hàng cuối cùng tự động)

Code:

# === Tách cột (tìm hàng cuối cùng tự động)
import xlwings as xw

wb = xw.Book(r"C:\tmp\BangDuLieu_ngaunhien.xlsx")
sht = wb.sheets.active

# === HOẶC tách first name, last name TỐI ƯU
sht["C:D"].insert ()
sht["C2:D2"].value = ["First Name 2", "Last Name 2"]
last_row = sht[f"B{sht.cells.last_cell.row}"].end("up").row # tìm hàng cuối cùng trong cột B
full_names = sht[f"B3:B{last_row}"].value

def split_fullname(full_name): # hàm tách first name và last name
    list_fullname = full_name.split(" ")
    list_firstname = list_fullname[:-1]
    first_name =" ".join(list_firstname)
    last_name = list_fullname[-1] 
    return [first_name, last_name]

data_fullnames = list(map(split_fullname, full_names)) # trả list of list
sht["C3"].value = data_fullnames

Xong!

Lập Trình Python Cho Excel/Python For Excel #006 - Copy Trích Xuất Cột, Vẽ Biểu Đồ, Xử Lý Chuỗi

 NỘI DUNG:

Mở file "BangDuLieu_ngaunhien.xlsx" và thực hiện

1. Copy và trích xuất dữ liệu theo yêu cầu:

- Copy dữ liệu từ ô A1 đến ô C11 dán vào ô A15 (chỉ copy nội dung)
- Copy dữ liệu từ ô A1 đến ô C11 dán vào ô A15 và giữ nguyên định dạng
- Trích xuất dữ liệu cột B và cột C dán vào ô E3
- Chỉ trích xuất dữ liệu dòng thứ 3 của cột B và cột C dán vào cột H3

2. Vẽ biểu đồ vừa trích xuất (cột B và cột C) ở bản dữ liệu từ ô E3 đến F11

3. Xử lý chuỗi:

- Xử lý theo từng ô:
   + B3: ghi hoa cả cell,
   + B4: ghi hoa chữ đầu tiên của chuỗi,
   + B5: chuyển sang chữ thường,
   + B6: ghi hoa đầu mỗi chữ
- Xử lý theo cột (Ghi hoa từ ô B7 đến ô B9)
- Xử lý theo dòng (Ghi hoa từ ô A2 đến ô C2)

4. Ghi hoa đầu mỗi chữ cho cột B viết code theo kiểu COMPERHENSION


THỰC HIỆN:

1. Copy và trích xuất dữ liệu theo yêu cầu:

- Copy dữ liệu từ ô A1 đến ô C11 dán vào ô A15 (chỉ copy nội dung)
- Copy dữ liệu từ ô A1 đến ô C11 dán vào ô A15 và giữ nguyên định dạng
- Trích xuất dữ liệu cột B và cột C dán vào ô E3
- Chỉ trích xuất dữ liệu dòng thứ 3 của cột B và cột C dán vào cột H3

Code:

import xlwings as xw

wb = xw.Book(r"C:\tmp\BangDuLieu_ngaunhien.xlsx")
sht = wb.sheets.active

# === copy không mất định dạng
sht["A15"].value= sht["A1:C11"].value # chỉ copy giá trị, cách này mất định dạng
sht["A1:C11"].copy(sht["A30"]) # copy nguyên định dạng và giá trị

# === copy trích xuất cột B, cột C
range_zip = zip(sht["B2:B11"].value, sht["C2:C11"].value)
range_zip = list (range_zip)
sht["E2"].value = range_zip # copy toàn bộ

sht["H2"].value = range_zip[3] # lấy dòng thứ 3


2. Vẽ biểu đồ vừa trích xuất (cột B và cột C) ở bản dữ liệu từ ô E3 đến F11

Code:

# === Vẽ biểu đồ
chart1 = sht.charts.add(300, 250) # vị trí biểu đồ là trái tính qua 300, trên tính xuống là 250
chart1.set_source_data(sht["E3:F11"])
chart1.chart_type = "line_markers"
# chart1.chart_type = "3d_pie"
# chart1.chart_type = "stock_hlc"


3. Xử lý chuỗi:

- Xử lý theo từng ô:
   + B3: ghi hoa cả cell,
   + B4: ghi hoa chữ đầu tiên của chuỗi,
   + B5: chuyển sang chữ thường,
   + B6: ghi hoa đầu mỗi chữ
- Xử lý theo cột (Ghi hoa từ ô B7 đến ô B9)
- Xử lý theo dòng (Ghi hoa từ ô A2 đến ô C2)

Code:

import xlwings as xw

wb = xw.Book(r"C:\tmp\BangDuLieu_ngaunhien.xlsx")
sht = wb.sheets.active
full_name = str(sht["B3"].value)
sht["B3"].value = full_name.upper() # ghi hoa cả cell
sht["B4"].value = full_name.capitalize() # ghi hoa chữ đầu tiên
sht["B5"].value = full_name.lower() # ghi thường tòan cell
sht["B6"].value = full_name.title() # ghi hoa đầu mỗi chữ

# === xử lý chuỗi trong cột
full_name = sht["B7:B9"].value
full_name_list =[]
for fn in full_name:
    full_name_list.append(fn.upper()) #chữ hoa
sht["B7"].options(transpose = True).value = full_name_list

# === xử lý chuỗi theo hàng
tieu_de = sht["A2:C2"].value
tieu_de_list =[]
for td in tieu_de:
    tieu_de_list.append(td.upper())
sht["A2"].value = tieu_de_list


4. Ghi hoa đầu mỗi chữ cho cột B viết code theo kiểu COMPERHENSION

Code:

# === Xử lý chuỗi - theo cột
import xlwings as xw

wb = xw.Book(r"C:\tmp\BangDuLieu_ngaunhien.xlsx")
sht = wb.sheets.active

# ===HOẶC xử lý chuỗi trong cột (comprehension)
full_name = sht["B3:B11"].value
full_name_list_2 =[]
full_name_list_2 =[fn.title() for fn in full_name]
sht["B3"].options(transpose = True).value = full_name_list_2


Xong!

Lập Trình Python Cho Excel/Python For Excel #005 - Vùng Dữ Liệu/Size data, Tìm Cột/Hàng Đầu, Tìm Cột/Hàng Cuối

NỘI DUNG

Tìm vùng dữ liệu

Tìm hàng đầu tiên có chứa dữ liệu

Tìm cột đầu tiên có chứa dữ liệu


THỰC HIỆN

STT Yêu Cầu Cấu Hình Commands Giải Thích
1 range_data = sht.used_range.get_address(False,False,False,False) Vùng chứa dữ liệu
2 Tìm hàng đầu first_row = sht.used_range.row HOẶC Hàng đầu tiên có chứa dữ liệu
if sht["B1"].value != None:
    first_row =1
else:
    first_row =sht["B1"].end("down").row Tìm từ ô B1 và tìm xuống
3 Tổng số hàng đang chứa dữ liệu count_row = sht.used_range.rows.count Số hàng đang chứa dữ liệu
4 Tìm hàng cuối last_row = first_row + count_row - 1 Hàng cuối cùng có chứa dữ liệu
last_row = sht[f"B{sht.cells.last_cell.row}"].end("up").row HOẶC
5 Tìm cột cuối cùng last_col = sht.range(first_row,sht.cells.last_cell.column).end("left").column Cột cuối cùng có chứa dữ liệu
6 Tìm cột đầu tiên if sht["A1"] != None:
    first_col = 1
else:
    first_col = sht["A1"].end("right").column
first_column_UR = sht.used_range.column HOẶC


Xong!

Lập Trình Python Cho Excel/Python For Excel #004 - Ẩn/Hiện Thêm/Xóa Dòng Cột & Định Dạng (Number, Text, datetime)

NỘI DUNG:

1. Ẩn hiện dòng cột, wrap text, merge

2. Định dạng number, text, datetime


THỰC HIỆN

1. Ẩn hiện dòng cột, wrap text, merge

STT Yêu Cầu Cấu Hình Commands Giải Thích
1 Ẩn cột B đến cột D sht["B:D"].api.EntireColumn.Hidden = True Nếu muốn hiện thì gáng bằng False
2 Ẩn hàng 3 đến hàng 4 sht["3:4"].api.EntireColumn.Hidden = True Nếu muốn hiện thì gáng bằng False
3 Xóa dữ liệu sht["A13:C18"].clear() Xóa dữ liệu từ ô A13 đến ô C18
4 Chèn/Insert sht["C:C"].insert() Chèn thêm 1 cột vào vị trí cột C
sht["4:4"].insert() Chèn 1 dòng vào dòng thứ 4
5 Xóa/Delete sht["C:D"].delete() Xóa từ cột C đến cột D
sht["4:6"].delete() Xóa từ dòng thứ 4 đến dòng thứ 6
6 Wrap text sht["B13"].wrap_text = True Chữ tự động xuống dòng nếu dữ liệu trong ô B13 quá dài
7 Merge KHÔNG MẤT dữ liệu vl_B10 = sht["B10"].value Gán giá trị của ô B10 vào biến vl_B10
vl_C10 = sht["C10"].value Gán giá trị của ô C10 vào biến vl_C10/td>
sht["B10"].value = f"{vl_B10} {vl_C10}" nối chuỗi
sht["C10"].clear() Xóa dữ liệu của ô C10, nhằm mục đích khi merge không bị thông báo "chỉ giữ lại dữ liệu của ô đầu"
sht["B10:C10"].merge() Thực hiện merge


2. Định dạng number, text, datetime

STT Yêu Cầu Cấu Hình Commands Giải Thích
1 Định dạng kế toán sht["D3"].number_format = "[Red] #,###.000" Ô D3 là số, cứ 3 số cách nhau dấu phẩy, mà ô là màu đỏ
sht["D4"].number_format = "$ #,###.00" Định dạng kế toán và thêm dấu $ ở đầu
sht["D5"].number_format = "#,00 %" Định dạng phần trăm
2 Nối chuỗi sht["C3:C11"].number_format ='# "tuoi"' Nếu dữ liệu trong ô là SỐ thì thêm vào chữ "tuoi" phía sau
sht["B3:B11"].number_format ='@ "VCK"' Nếu dữ liệu trong ô là CHỮ thì thêm vào chữ "VCK" phía sau
3 Shrink To Fit sht["B3:B11"].api.ShrinkToFit = True Nếu chữ dài/nhiều hơn độ rộng của ô thì tự động co nhỏ lại cho vừa 1 dòng
4 Gán công thức sht["E11"].value = "=now()" Gán ô E11 có công thức là hàm now()
5 Định dạng sht["E11"].number_format= "dd-mm-yyyy" Định dạng ngày-tháng-năm
sht["E11"].number_format= "dd-mm-yyyy hh:mm AM/PM" Định dạng ngày-tháng-năm giờ phút theo múi 12 giờ
sht["E11"].number_format= "hh:mm AM/PM" Giờ phút múi giờ là 12


Ví dụ: Covert các text trong list dạng ngày-tháng-năm, gán vào cột D, bắt đầu từ ô D3, dữ liệu cột D tự động co lại cho vừa kích thước hiện tại của ô.

Code:

# === convert text to datetime
import xlwings as xw
from datetime import datetime

wb = xw.Book(r"C:\tmp\BangDuLieu_ngaunhien.xlsx")
sht = wb.sheets.active
list_date = ["12/12/2021", "15/08/2021","8/5/2021","9/12/2021","11/1/2021"]
list_convert = []
for i in range(0,len(list_date)):
    date_i = datetime.strptime(list_date[i], "%d/%m/%Y")
    list_convert.append(date_i)
sht["D3"].options(transpose = True).value = list_convert
sht["D:D"].api.ShrinkToFit = True 


Xong!

Lập Trình Python Cho Excel/Python For Excel #003 - Màu Chữ, Màu Nền, Kiểu Chữ

NỘI DUNG

Mở file BangDuLieu_ngaunhien.xlsx và thực hiện theo yêu cầu:

- A1 -> C1: font size là 15, kiểu chữ Arial, màu của chữ là màu xanh, màu nền màu vàng
- A2 -> C2: Chữ màu nâu, nền màu xám đâm
- B3: chữ in đậm
- B4: chữ in nghiêng
- B5: chữ gạch chân
- B6 -> B7: Chữ in hoa
- B8 -> B9: Chữ thường
- Cột C nếu giá trị số lớn hơn 30 thì tô màu nền là vàng


THỰC HIỆN

Mở file BangDuLieu_ngaunhien.xlsx và thực hiện theo yêu cầu:

- A1 -> C1: font size là 15, kiểu chữ Arial, màu của chữ là màu xanh, màu nền màu vàng
- A2 -> C2: Chữ màu nâu, nền màu xám đâm
- B3: chữ in đậm
- B4: chữ in nghiêng
- B5: chữ gạch chân
- B6 -> B7: Chữ in hoa
- B8 -> B9: Chữ thường
- Cột C nếu giá trị số lớn hơn 30 thì tô màu nền là vàng

Code:

# === Định dạng font, màu, kiểu chữ
import xlwings as xw

wb = xw.Book(r"C:\tmp\BangDuLieu_ngaunhien.xlsx")
sht = wb.sheets.active
sht = wb.sheets ["Sheet1"]
sht["A1:C1"].font.size = 15
sht["A1:C1"].font.name = "Arial"

# === Kiểu chữ
sht["B3"].font.bold = True
sht["B4"].font.italic = True
sht["B5"].api.Font.Underline = True

range_B = sht["B6:B7"].value
for i in range(len(range_B)):
    sht[f"B{i+6}"].value = range_B[i].upper() # in hoa 
    
range_B = sht["B8:B9"].value
for i in range(len(range_B)):
    sht[f"B{i+8}"].value = range_B[i].lower() # in thường 
    # sht[f"B{i+6}"].value = range_B[i].capitalize() # in hoa chữ đầu tiên

# === Màu chữ
# tham khảo bảng màu https://docs.microsoft.com/en-us/office/vba/api/excel.colorindex
sht["A1"].api.Font.ColorIndex = 5 # màu xanh
sht["A2:C2"].api.Font.ColorIndex = 30 # màu nâu

# === Màu nền
# tham khảo màu https://www.rapidtables.com/web/color/RGB_Color.html
sht["A1"].color = (255,255,0) # vàng
sht["A2:C2"].color = (160,160,160) # xám

# === Màu nền theo hàng chẵn lẻ
for i in range(3,11):
    if sht[f"A{i}"].value % 2 == 0:
        sht[f"A{i}:C{i}"].color = (224,224,224) #xám
    else:
        sht[f"A{i}:C{i}"].color = (255,255,255)

# === màu nền có điều kiện - Conditional Formattting Highlight
sht["C3:C11"].color = (255,255,255) # trắng
column_number = [3] # cột C
check_number = 30 # số cần kiểm tra
for j in column_number:
    for i in range(11,2,-1):
        if sht.range(i, j).value > check_number:
            sht.range(i,j).color = (255,255,200) # nếu thỏa mãn điều kiện thì tô màu nền


Tham khảo bảng màu chữ tại và màu nền tại đây

Kết Quả


Xong!

Lập Trình Python Cho Excel/Python For Excel #002 - Bảng Dữ Liệu - Căn Lề, Kẻ Bảng, Kích Thước, Font Chữ

 NỘI DUNG

1. Định dạng font/kiểu chữ, căn chỉnh lề, kẻ bảng, điều chỉnh kích thước

2. Các ví dụ làm quen với bảng dữ liệu

3. Copy bảng dữ liệu/copy sheet


THỰC HIỆN

1. Định dạng font/kiểu chữ, căn chỉnh lề, kẻ bảng, điều chỉnh kích thước

STT Yêu Cầu Cấu Hình Commands Giải Thích
1 Import thư viện import xlwings as xw
from xlwings.constants import HAlign, VAlign
2 xw.Book()
3 sht = xw.sheets.active
4 sht.book.save("BangDuLieu.xlsx")
5 Gán dữ liệu cho ô sht["C1"].value = "NOI DUNG" gán ô C1 có giá trị là: NOI DUNG
6 Định dạng font chữ, kiểu chữ cho Cell sht["C1"].font.name = "Arial" gán font chữ cho ô C1
sht["C1"].font.size = 15 Cỡ chữ là 15
sht["C1"].font.bold = True định dạng ô C1 là in đậm
sht["C1"].font.italic = True định dạng ô C1 là in nghiêng
sht["C1"].api.Font.Underline = True định dạng ô C1 gạch chân
7 merge cell sht["A1:C1"].merge() merge từ ô A1 -> C1
8 sht["A1:C1"].wrap_text = True Tự động xuống hàng nếu chữ dài hơn độ rộng của ô
9 Căn giữa sht["A1"].api.VerticalAlignment = VAlign.xlVAlignCenter
sht["A1"].api.HorizontalAlignment = HAlign.xlHAlignCenter
10 Gán dữ liệu theo chiều dọc list_no = list(range(1,10)) Tạo ra list có giá trị 1-9
sht["A3"].options(transpose=True).value = list_no transpose = True: là theo chiều dọc, gán giá trị A3 là 1, A4 là 2,.....,
11 Chỉnh kích thước sht["1:11"].row_height = 20 Chiều cao của các hàng từ 1 đến 11 là 20
sht["B:C"].column_width = 25 Độ rộng cột B đến C là 25
12 AutoFit sht["C:C"].autofit() Dữ liệu cột C tự động điều chỉnh theo thước hiện tại của cột
13 Kẻ bảng for i in range (7, 13): bắt buộc 7, 13
    sht["A2:C11"].api.Borders(i).LineStyle = 1 Từ ô A2 đến C11 kẻ đường kẻ đơn, 1 là kẻ đơn


2. Các ví dụ làm quen với bảng dữ liệu

Ví dụ 1: 

Gán dữ liệu vào ô, định dạng như hình và lưu file lại thành file "BangDuLieu.xlsx"


Code:

import xlwings as xw 
from xlwings.constants import HAlign, VAlign

wb = xw.Book()
sht = xw.sheets.active
sht['A1:F100'].clear()

sht['C1'].value = "Thong Tin Nhan Vien"
sht['C1'].api.Font.Name = 'Arial'
sht['C1'].api.Font.Bold = True
sht['A1:E1'].merge()
sht["A1:E1"].api.HorizontalAlignment = HAlign.xlHAlignCenter

list_menu = ["No","Employee Name","National","Age","Gender"] # tiêu đề
sht['A2'].value = list_menu
sht['A2:E2'].api.WrapText = True
sht["A2:E2"].api.HorizontalAlignment = HAlign.xlHAlignCenter
sht["A2:E2"].api.VerticalAlignment = VAlign.xlVAlignCenter
sht['A2:E2'].api.Font.Bold = True
sht.book.save("BangDuLieu.xlsx")


Ví dụ 2:

Mở file "BangDuLieu.xlsx" ở ví dụ 1, điền thông tin, định dạng, điều chỉnh chiều cao cho hàng, độ rộng cho cột và kẽ viền như hình dưới, lưu lại với tên file mới là "BangDuLieu_Vien.xlsx" và đóng file "BangDuLieu.xlsx"


Code:

import xlwings as xw 
from xlwings.constants import HAlign, VAlign

wb = xw.Book(r"C:\tmp\BangDuLieu.xlsx")
sht = wb.sheets["Sheet1"] 
list_No = [1,2,3,4,5]
list_Employee = ['Jonathan Wick', 'Steve Roger', 'Helen Johansson', 'George Butcher', 'Britany Moonwalk']
list_National = ['USA', 'France', 'Italia','USA', 'France']
list_Age = [25,26,27,28,26]
list_gender = ['Male','Male','Female','Male','Female']

sht['A3'].options(transpose=True).value = list_No
sht['B3'].options(transpose=True).value = list_Employee
sht['C3'].options(transpose=True).value = list_National
sht['D3'].options(transpose=True).value = list_Age
sht['E3'].options(transpose=True).value = list_gender

#Set witdh to columns and height to rows
sht['1:7'].row_height = 20
sht['A:A'].column_width = 5
sht['B:B'].column_width = 15
sht['C:E'].column_width = 10
sht['A3:E7'].api.HorizontalAlignment = HAlign.xlHAlignCenter

#Set border to sample excel
for i in range(7,13):
    sht['A2:E7'].api.Borders(i).LineStyle = 1 

wb = xw.books.active
wb.save("BangDuLieu_Vien.xlsx")
wb.close("BangDuLieu.xlsx")


Ví dụ 3:

- Tạo tiêu đề cho bảng dữ liệu với 3 cột có nội dung là: No., Full Nam, Age. Với các giá trị từng cột là

+ No. là số từ 1-9
+ Full Name: là các tên được sinh ra ngẫu nhiên
+ Age: là số ngẫu nhiên trong khoảng từ 20-50

- Căn chỉnh chữ, kích thước vừa các hàng cột

- Kẻ khung nét kẻ đơn cho bảng dữ liệu

- Lưu file với tên "BangDuLieu_ngaunhien.xlsx"

Code:

import xlwings as xw 
from xlwings.constants import HAlign, VAlign
import random

wb = xw.Book()
sht = xw.sheets.active

sht['A1'].value = "TẠO BẢNG DỮ LIỆU NGẪU NHIÊN"
sht['A1'].api.Font.Name = 'Arial'
sht['A1'].api.Font.Bold = True
sht['A1:C1'].merge()
sht["A1:C1"].api.HorizontalAlignment = HAlign.xlHAlignCenter
sht["A1:C1"].api.VerticalAlignment = VAlign.xlVAlignCenter

sht["A2"].value = ["No.","Full Name","Age"] # ô A2 có nội dung là No., A3 là Full Name,....
sht["2:2"].font.bold = True
sht["2:2"].api.HorizontalAlignment = HAlign.xlHAlignCenter
sht["2:2"].api.VerticalAlignment = VAlign.xlVAlignCenter

list_no = list(range(1,10)) # Tạo ra list có giá trị 1-9 
sht["A3"].options(transpose=True).value = list_no # transpose = True: là theo chiều dọc, gán giá trị A3 là 1, A4 là 2,.....,

def get_full_name(first_name, mid_name, last_name): # hàm nối chuỗi, fullname
    full_name = f"{first_name} {mid_name} {last_name}"
    return full_name 

list_first_name = ["Van","Nguyen","Tran","Le","Pham"]
list_mid_name = ["Cong","Hoang","Quynh"]
list_last_name = ["Khanh","Chin","Huy","Dung","Phi","Son","Hung","Cuong"]

list_full_name =[] # list trống, để chứa cá tên
list_tuoi = []

for i in range(1,10):
    first_name = random.choice(list_first_name) # chọn ngẫu nhiên mội tên/giá trị trong list_first_name
    mid_name = random.choice(list_mid_name)
    last_name =random.choice(list_last_name)
    list_full_name.append(get_full_name(first_name,mid_name,last_name)) #gọi hàm get_full_name và thêm vào list
    list_tuoi.append(random.randrange(20,50,1)) # chọn ngẫu nhiên số trong khoảng 20 -> 50, bước nhảy là 1

sht["B3"].options(transpose=True).value = list_full_name # gáng giá trị của list_full_name cho B3, B4, B5....
sht["C3"].options(transpose=True).value = list_tuoi # tương tự, gán giá trị cho C3, C4,...

# ===chỉnh kích thước, autofit
sht["C:C"].autofit() # vì A1 đến C1 merge cell nên chúng ta phải để đầu tiên
sht["1:1"].row_height = 30 # chiều cao của hàng đầu tiên
sht["2:11"].row_height = 20 # chiều cao của hàng
sht["A:A"].column_width = 5 # độ rộng cột A là 5
sht["B:B"].column_width = 25 # độ rộng cột B - C là 25
sht["C:C"].api.HorizontalAlignment = HAlign.xlHAlignCenter

# ===Kẻ bảng/border
for i in range (7, 13): # bắt buộc 7, 13
    sht["A2:C11"].api.Borders(i).LineStyle = 1 # 1 là kẻ đơn

wb = xw.books.active
wb.save("BangDuLieu_ngaunhien.xlsx")
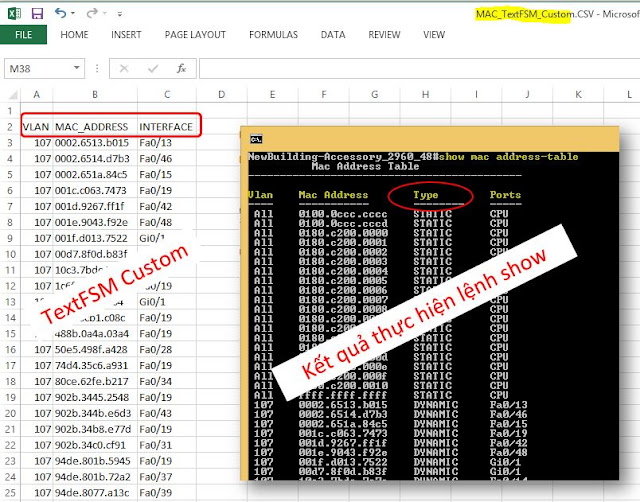
Kết quả:


3. Copy bảng dữ liệu/copy sheet

Code:

import xlwings as xw

wb = xw.Book(r"C:\tmp\BangDuLieu_ngaunhien.xlsx")
xw.sheets.add(name="backup", after="Sheet1") # tạo sheet mới có tên backup, sheet này đứng sau sheet1
sht = xw.sheets["Sheet1"]
sht_bk = xw.sheets["backup"]
sht["A2:C11"].copy(sht_bk["A2:C11"]) # copy dữ liệu từ A2:C11 của sheet1 đến sheet có tên backup
wb.save("BangDuLieu_copy.xlsx")

Kết quả:


Xong!

Lập Trình Python Cho Excel/Python For Excel #001

NỘI DUNG:

1. Ý nghĩa/Giải thích dòng lệnh

2. Làm quen về hàm/Function

3. Làm quen với VBA

4. Gọi VBA từ python có truyền tham số 

5. Hyperlink Function


THỰC HIỆN:

1. Ý nghĩa/Giải thích dòng lệnh

STT Yêu Cầu Cấu Hình Commands Giải Thích
1 Import thư viện import xlwings as xw import tất cả các hàm số trong file xlwings.py với tên đại diện là xw
2 Tạo file mới xw.Book() Tạo file excel mới
xw.App() Tạo workbook mới bằng App
xw.App(add_book=False) Nếu đã có workbook mới rồi thì không tạo workbook mới
xw.App(visible=False) Mở nhưng không hiển thị
3 Gọi workbook hiện hành wb1 = xw.books.active
4 In ra tên của workbook hiện hành print(wb1.name)
5 Lưu file wb1.save("Workbook1.xlsx") Lưu workbook hiện hành thành tên Workbook1.xlsx
6 Đóng wb1.close() Đóng file hiện hành
app.quit() Đóng app đã mở
7 Gọi workbook có tên Workbook1.xlsx wb2 = xw.books["Workbook1.xlsx"] file này phải được mở
8 Mở file wb3 = xw.Book(r"C:\Users\khanhvc\Workbook1.xlsx") mở file Workbook1.xlsx tại đường dẫn "C:\Users\khanhvc"
wb4 = xw.Book(fullname = r"C:\Users\khanhvc\Workbook1.xlsx",password="MatkhauMofile",) mở file Workbook1.xlsx có mật khẩu mở file là: "MatkhauMofile"
9 Kết nối với sheet sh_active = wb3.sheets.active kết nối với sheet hiện hành
sh_index = wb3.sheets[0] # là sheet được tạo ra đầu tiên sẽ có index là 0
sh_name = wb3.sheets["Thu-2"] sheet có tên "Thu-2"
10 Tạo sheet mới wb4.sheets.add() Tạo sheet mới đứng đầu tiên trong danh sách sheet(Phải mở file trước khi dùng lệnh này)
wb4.sheets.add("Thu-4", after = "Thu-1") Tạo ra sheet mới có tên Thu-4 và sheet này đứng SAU sheet Thu-1
wb4.sheets.add("Thu-5", before = "Thu-1") Tạo ra sheet mới có tên Thu-5 và sheet này đứng TRƯỚC sheet Thu-1
11 Đổi tên sheet for sh in wb4.sheets: dùng for để duyệt tất cả các sheet
    if sh.name == "Thu-5": Nếu tên là "Thu-5" thì
        sh.name = "Thu-05" đổi tên mới là "Thu-05"
12 Xóa sheet     for sh in wb4.sheets: dùng for để duyệt tất cả các sheet
    if sh.name == "Thu-05": Nếu tên là "Thu-05" thì
        sh.delete() Xóa sheet có tên là: "Thu-05"
13 Xóa sheet (ngoại trừ) for sh in wb4.sheets: dùng for để duyệt tất cả các sheet
    if sh.name != "Thu-05": Nếu KHÔNG PHẢI là "Thu-05" thì
        sh.delete() xóa tất cả các sheet ngoại trừ sheet có tên Thu-1
14 Tạo nhiều sheet for i in range(0,12):
    wb4.sheets.add(f"Thang {i + 1}", after=wb4.sheets[i]) Tạo 12 sheet có tên là Thang 1,..., Thang 12 và sắp xếp theo thứ tự tăng dần.
15 Lấy tên sheet trong workbook lst_sh = [] Tạo list rỗng
for sh in wb4.sheets:
    lst_sh.append(sh.name) thêm tên của sheet vào list
print (lst_sh) in ra để kiểm tra
16 Copy sheet wb4.sheets["Thu-1"].copy(name="Thu-01", after=wb4.sheets["Thang 1"]) Cope sheet Thu-1 sang sheet mới có tên Thu-01, và đứng SAU sheet có tên "Thang 1"
17 Di chuyển sheet wb4.sheets["Thu-1"].copy(name="temp") Copy sheet "Thu-1" thành sheet mới có tên "temp", sheet "temp" sẽ đứng ở cuối cùng trong tất cả các sheet
wb4.sheets["Thu-1"].delete() Xóa sheet "Thu-1"
wb4.sheets["temp"].name = "Thu-1" Đổi tên sheet temp thành Thu-1, vì không có thuộc tính rename nên phải làm cách trung gian này
18 Ẩn/Hiện sheet wb4.sheets["Thu-1"].visible = False Hiện
wb4.sheets["Thu-1"].visible = True Ẩn
19 Hiện tất cả các sheet for sh in wb4.sheets: dùng for để duyệt
    sh.visible = True
20 To PDF wb4.sheets["Thu-1"].to_pdf() Chuyển sheet "Thu-1" về PDF
wb4.sheets["Thu-1"].to_pdf(path=r"c:\tmp\Thu-1") Chuyển sheet "Thu-1" về PDF vào đường dẫn "c:\tmp\Thu-1"


2. Làm quen về hàm/Function

  • Hàm 1 biến số
def kiemtra_chanle(num):
    # hàm kiểm tra chẵn lẽ, 1 đối số
    if num % 2 == 0: # chia lấy phần dư, nếu số dư =0 thì là chẳn
        print (f"So {num} la so chan")
    else:
        print (f"So {num} la so le")

kiemtra_chanle(4) # gọi hàm, kiểm tra 4 là số gì


  • Hàm 2 biến số

def kiemtra_chanle(num1, num2 = 0): # nếu truyền 1 đối số, thì đối số  num2 sẽ gán = 0
    # hàm kiểm tra chẵn lẽ, 2 đối số
    for num in [num1, num2]:
        if num % 2 == 0:
            print (f"So {num} la so chan")
        else:
            print (f"So {num} la so le")

kiemtra_chanle(5) # truyền 1 đối số vào thì đối num1 sẽ được gán bằng số truyền vào, num2 sẽ gán = 0
kiemtra_chanle(5,6)
kiemtra_chanle(num2=50,num1=15) # tuy nhiên chúng ta cũng có thể truyền đối số theo cách này


  • Hàm nhiều biến
def kiemtra_chanle_splat(*nums): # có nhiều đối số
    for num in nums:
        if num % 2 == 0:
            print (f"So {num} la so chan")
        else:
            print (f"So {num} la so le")      

kiemtra_chanle_splat(10,11,13,6,9,8)


  • Hàm truyền key và giá trị
def ten_diem(ten,**so_diem): # truyền key và giá trị
    '''
    in ra ten diem cac mon hoc, va tong diem cac mon
    '''
    print (f"Ten: {ten}")
    for mon, diem in so_diem.items():
        print (f"Mon: {mon},  Diem: {diem}")
    print(f"Tong diem: {sum(so_diem.values())}")
    
ten_diem('khanh', toan = 8, van = 6, TA = 7)

Tìm hiểu thêm về cách viết và gọi hàm tại đây

3. Làm quen với VBA

3.1 Tạo VBA code: Mở Excel tạo file và lưu có phần mở rộng là .xlsm; mở VBA soạn nội dung như bên dưới (vba dưới là protect/unprotect sheet)

Sub ProtectSheetWithPassword()
'Protect worksheet with a password
Sheets("Thu-1").Protect Password:="myPassword"
End Sub

Sub UnProtectSheetWithPassword()
'Unprotect a worksheet with a password
Sheets("Thu-1").Unprotect Password:="myPassword"
End Sub
Tham khảo vba tại exceloffthegrid.com hoặc www.automateexcel.com 

3.2. Gọi VBA từ python

wb5.xw.Boot("Vidu.xlsx")
wb5.save("Vidu.xlsm") # vì macro chỉ hoạt động với đuôi .xlsm nên chúng ta phải lưu theo kiểu này
wb5 = xw.Book("Vidu.xlsm")
protect_sh = wb5.macro("ProtectSheetWithPassword")
protect_sh () # gọi vba để protect sheet hiện hành
protect_sh = wb5.macro("UnProtectSheetWithPassword")
protect_sh () # gọi vba unprotect sheet

4. Gọi VBA từ python có truyền tham số

Tạo VBA code

Sub NamedRanges_Example(vungchon As String, ten_vungchon As String)
' dat ten cho vung/ Define name
  Dim Rng As Range

  Set Rng = Range(vungchon)

  ThisWorkbook.Names.Add Name:=ten_vungchon, RefersTo:=Rng

End Sub

Sub ConditionalFormattingExample(vungchon As String)
 
'Define Range
Dim MyRange As Range
Set MyRange = Range(vungchon)
 
'Delete Existing Conditional Formatting from Range
MyRange.FormatConditions.Delete
 
'Apply Conditional Formatting
        
' neu = 8, mau vang
MyRange.FormatConditions.Add Type:=xlCellValue, Operator:=xlEqual, _
        Formula1:="=8"
MyRange.FormatConditions(1).Interior.Color = RGB(255, 255, 204)

' neu > 8, mau cam
MyRange.FormatConditions.Add Type:=xlCellValue, Operator:=xlGreater, _
        Formula1:="=8"
MyRange.FormatConditions(2).Interior.Color = RGB(255, 204, 153)

End Sub

Các bạn có thể record macro hoặc tham khảo VBA tại đây


Gọi VBA từ python

def datten_lab(vungchon, ten_vungchon): # dat ten cho vung lab co diem
	wb1 = xw.Book.caller() # sheet đang active hoặc bạn có thể khởi tạo book mới để test
	datten = wb1.macro(rf'NamedRanges_Example("{vungchon}","{ten_vungchon}")') # gọi macro bên excel
	datten ()

def mau_nen(vungchon): # xét điểm cao đánh màu nền
	wb1 = xw.Book.caller()
	maunen = wb1.macro(rf'ConditionalFormattingExample("{vungchon}")') # gọi macro bên excel
	maunen()

datten_lab("E10:E20") 
mau_nen("E10:E20")


5. Hyperlink Function

=HYPERLINK("#Sheet1!A100","Ten can dat") 

=HYPERLINK("đường dẫn đến file cần mở","Ten can dat")


Xong!


Network Automation #013 - Create/Unzip/Extract A ZIP Archive File In Python - Tạo/Bung/Giải File ZIP Trong Python

 YÊU CẦU

1. Viết hàm nén/tạo file ZIP:

a. Một loại định dạng file ở thư mục hiện tại.
b. Tất cả các file, đường dẫn tự truyền vào
c. Một loại định dạng file nhất định, đường dẫn và loại file được truyền vào
d. Thêm file vào file ZIP đã tồn tại


2. Viết hàm giải nén/extract file ZIP


THỰC HIỆN:

1. Viết hàm nén/tạo file ZIP:

a. Một loại định dạng file ở thư mục hiện tại.
'''
Tạo file nén ở thư mục hiện tại, file tự truyền vào.
Ví dụ chỉ nén các file *.py:
to_zip("abc",".py")
hoặc to_zip("abc1","csv")
'''
import os
from zipfile import ZipFile
from datetime import datetime
import zipfile

def to_zip(zip_file, type_file): # Hàm tạo file zip
	path = os.getcwd()  # lấy đường dẫn hiện tại	
	zip_file = zip_file + ".zip"
	if not os.path.isfile(zip_file):
   		zf = ZipFile(zip_file, "w")
	else: # Nếu file đã tồn tại thì không ghi header
   		zf = ZipFile(zip_file, "a")
	for file in os.listdir(os.curdir): # tương đương lệnh dir trong cmd của windows, liệt kê file, folder trong thư mục hiện tại
	    if file.endswith(type_file) and os.path.isfile(os.curdir + '/' + file): # đảm bảo đúng là file, và file có định dạng được đưa vào từ type_file
	       	#print(file) # Liệt kê các file cần nén
	       	zf.write(file)

	zf.close()
	print (f"***Please check files '{zip_file}' at '{path}' ***\n")		

# Gọi hàm zip
to_zip("abc",".py")
to_zip("abc1","csv")


b. Tất cả các file, đường dẫn tự truyền vào
'''
Nén tất cả các file ở thư mục
ví dụ nén tất cả các file tại đường dẫn "C:\Intel" thành file có tên abc123.zip:
to_zip_dir("abc123.zip", r"C:\Intel")
'''
from zipfile import ZipFile
import os
from os.path import basename
from pprint import pprint # dùng để in ra đẹp, dễ nhìn hơn

def to_zip_dir(zip_file, dir_name): # Hàm nén tất cả các file trong thư mục
    path = os.getcwd()  # lấy đường dẫn hiện tại    path = os.getcwd()  # lấy đường dẫn hiện tại    
    with ZipFile(zip_file, 'w') as zipObj:
       for folder_Name, sub_folders, file_names in os.walk(dir_name): # lấy thông tin của file, folder tại đường dẫn dir_name
           #pprint(list(os.walk(dir_name)) )
           for file_name in file_names:
               filePath = os.path.join(folder_Name, file_name) # đường dẫn đầy đủ đến file cần backup
               zipObj.write(filePath, basename(filePath)) # thực hiện nén file
    print (f"***Please check files '{zip_file}' at '{path}' ***\n")            

#gọi hàm nén file
to_zip_dir("abc123.zip", r"C:\Intel")


c. Một loại định dạng file nhất định, đường dẫn và loại file được truyền vào 
'''
Ví dụ:
Thực hiện nén các file *.py tại đường dẫn "C:\Intel" thành file có tên abcde.zip:
to_zip_filter("abcde.zip",r"C:\Intel","py")

Thực hiện nén các file *.* tại đường dẫn "C:\Intel" thành file có tên abcdef.zip:
to_zip_filter("abcdef.zip",r"C:\Intel","")
'''
from zipfile import ZipFile
import os
from os.path import basename
from pprint import pprint # dùng để in ra đẹp, dễ nhìn hơn

def to_zip_filter(zip_file, dir_name, type_file): # Hàm nén (filter) file trong thư mục
    path = os.getcwd()  # lấy đường dẫn hiện tại    path = os.getcwd()  # lấy đường dẫn hiện tại    
    with ZipFile(zip_file, 'w') as zipObj:
       for folder_Name, sub_folders, file_names in os.walk(dir_name): # lấy thông tin của file, folder tại đường dẫn dir_name
           #pprint(list(os.walk(dir_name)) )
           for file_name in file_names:
               if file_name.endswith(type_file): # tên file tận cùng là ...
                 filePath = os.path.join(folder_Name, file_name) # đường dẫn đầy đủ đến file cần backup
                 zipObj.write(filePath, basename(filePath)) # thực hiện nén file
    print (f"***Please check files '{zip_file}' at '{path}' ***\n")            
         
to_zip_filter("abcde.zip",r"C:\Intel","py") # tất cả các file *.py
to_zip_filter("abcdef.zip",r"C:\Intel","") # tất cả các file


d. Thêm file vào file ZIP đã tồn tại


def add_tozip (path, file_name):
	with zipfile.ZipFile(rf"{path}\File_ZIP_DangTonTai.zip", 'a') as zipf: # Mở file zip tại đường dẫn, nếu file chưa có tạo mới file
    # Thêm file source_path vào destination
    # Nếu file đã có sẽ ghi đè
    

	    source_path = rf"{path}\{file_name}" 
	    destination = rf"{file_name}"
	    zipf.write(source_path, destination) # thực hiện việc ghi file, nếu có ghi đè (nhưng chương trình sẽ thông báo)

2. Viết hàm giải nén/extract file ZIP

'''
Giải nén file zip
Ví dụ:
- zip_extract(r"C:\Intel\now.zip", "abc.csv", r"C:\Intel") # tìm file abc.csv trong file "C:\Intel\now.zip" và extract đến đường dẫn "C:\Intel"
- zip_extract(r"C:\Intel\now.zip", "", r"C:\Intel") # Giải nén tất cả các file trong file "C:\Intel\now.zip" và extract đến đường dẫn "C:\Intel"

'''
import os
from zipfile import ZipFile
from datetime import datetime
import zipfile

def zip_extract(zip_file, type_file, to_dir): #Hàm giải nén file zip
	#zip_file = zip_file + ".zip"
	with ZipFile(zip_file, 'r') as zip:
		if type_file == "all" or type_file == "*" or type_file == "":
		    print('Extracting all the files ...')
		    zip.printdir()# in thông tin các file có trong file zip
		    zip.extractall(to_dir) # extract tất cả các file
		else: 
			zip.extract(type_file, to_dir) # extract 1 file với tên file mới truyền vào
	
	print (f"***Please check files '{type_file}' at '{to_dir}' ***\n")		

# cách gọi hàm    	
zip_extract(r"C:\Intel\now.zip", "abc.csv", r"C:\Intel") # tìm file abc.csv trong file "C:\Intel\now.zip" và extract đến đường dẫn "C:\Intel"
zip_extract(r"C:\Intel\now.zip", "", r"C:\Intel") # Giải nén tất cả các file trong file "C:\Intel\now.zip" và extract đến đường dẫn "C:\Intel"


Xong!

Network Automation #012 - SMTP Sending Emails With Attachment in Python - Gửi Mail Đính Kèm File Bằng Python

YÊU CẦU:

1. Sử dụng thư viện email smtplib của python để kết nối đến gmail để gửi mail đính kèm attach file

2. Gửi mail hàng loạt, đính kèm attach file với thông tin được lưu trữ trong file email_list.csv

3. Sử dụng profile hiện của MS Outlook để gửi mail.


THỰC HIỆN

1. Sử dụng thư viện email smtplib của python để kết nối đến gmail để gửi mail đính kèm attach file

Code:

'''
Kết nối đến Gmail để gửi mail và đính kèm attach file

Điều kiện:
1. Tắt bảo mật 2 lớp
https://myaccount.google.com/security?utm_source=OGB&utm_medium=act#signin

2. Allow less secure apps: ON
https://myaccount.google.com/u/1/lesssecureapps?pli=1&pageId=none

nếu không chúng ta sẽ gặp lỗi
#smtplib.SMTPAuthenticationError: (535, b'5.7.8 Username and Password not accepted. Learn more at\n5.7.8  https://support.google.com/mail/?p=BadCredentials qe12sm2115875pjb.29 - gsmtp')

Link tham khảo
https://realpython.com/python-send-email/
'''
import email, smtplib, ssl
from email import encoders
from email.mime.base import MIMEBase
from email.mime.multipart import MIMEMultipart
from email.mime.text import MIMEText

def send_mail_att(mail_from, mail_password, mail_to, mail_subject, mail_body, att_file): # Hàm gửi mail
	port = 465  # For SSL
	smtp_server = "smtp.gmail.com"
	# Create a multipart message and set headers
	message = MIMEMultipart()
	message["From"] = mail_from
	message["To"] = mail_to
	message["Subject"] = mail_subject
	#message["Bcc"] = "khanhvc2003@yahoo.com"

	# Add body to email
	message.attach(MIMEText(mail_body, "plain"))

	# Open file in binary mode
	with open(att_file, "rb") as attachment:
	    # Add file as application/octet-stream
	    # Email client can usually download this automatically as attachment
	    part = MIMEBase("application", "octet-stream")
	    part.set_payload(attachment.read())

	# Encode file in ASCII characters to send by email    
	encoders.encode_base64(part)

	# Add header as key/value pair to attachment part
	part.add_header("Content-Disposition", f"attachment; filename = {att_file}")

	# Add attachment to message and convert message to string
	message.attach(part)
	text = message.as_string()

	# Log in to server using secure context and send email
	context = ssl.create_default_context()
	try:
		with smtplib.SMTP_SSL(smtp_server, port, context = context) as server:
		    server.login(mail_from, mail_password)
		    server.sendmail(mail_from, mail_to, text)
		    print (f"Successfuly sent to '{mail_to}'")
	except:
		print (f"Communication failure in '{smtp_server}'")

email_info = {
	"mail_from": "khanhvc.wrk@gmail.com",
	"mail_password": "matkhaucuaban" ,
	"mail_to": "khanhvc@hansollvina.com",
	"mail_subject" : "This is for testing 8.19 r duong dan BO PHAY" ,
	"mail_body": "This is for testing email",
	"att_file": r"C:\python\Blog\TextFSM Custom.JPG"
	#pass_mail = input("Type your password and press enter:")
}
send_mail_att(**email_info)


2. Gửi mail hàng loạt, đính kèm attach file với thông tin được lưu trữ trong file email_list.csv

Tạo file email_list.csv có dạng:


Code:
'''
Kết nối đến Gmail để gửi mail và đính kèm attach file, danh sách các địa chỉ email được lưu trong file

Điều kiện:
1. Tắt bảo mật 2 lớp
https://myaccount.google.com/security?utm_source=OGB&utm_medium=act#signin

2. Allow less secure apps: ON
https://myaccount.google.com/u/1/lesssecureapps?pli=1&pageId=none

nếu không chúng ta sẽ gặp lỗi
#smtplib.SMTPAuthenticationError: (535, b'5.7.8 Username and Password not accepted. Learn more at\n5.7.8  https://support.google.com/mail/?p=BadCredentials qe12sm2115875pjb.29 - gsmtp')

Link tham khảo
https://realpython.com/python-send-email/
'''
import email, smtplib, ssl
from email import encoders
from email.mime.base import MIMEBase
from email.mime.multipart import MIMEMultipart
from email.mime.text import MIMEText

import pandas as pd
from datetime import datetime
import os

path = os.getcwd()  # lấy đường dẫn hiện tại
now = datetime.now().strftime("%Y-%b-%d_%H%M%S")

ERR_log = f"Send_Mail_{now}_ERR_logs.log" # định nghĩa tên file lưu trữ thông tin lỗi

def send_mail_att(mail_from, mail_password, mail_to, mail_subject, mail_body, att_file): # Hàm gửi mail
	port = 465  # For SSL
	smtp_server = "smtp.gmail.com"
	# Create a multipart message and set headers
	message = MIMEMultipart()
	message["From"] = mail_from
	message["To"] = mail_to
	message["Subject"] = mail_subject
	#message["Bcc"] = "khanhvc2003@yahoo.com"

	# Add body to email
	message.attach(MIMEText(mail_body, "plain"))

	# Open file in binary mode
	with open(att_file, "rb") as attachment:
	    # Add file as application/octet-stream
	    # Email client can usually download this automatically as attachment
	    part = MIMEBase("application", "octet-stream")
	    part.set_payload(attachment.read())

	# Encode file in ASCII characters to send by email    
	encoders.encode_base64(part)

	# Add header as key/value pair to attachment part
	part.add_header("Content-Disposition", f"attachment; filename = {att_file}")

	# Add attachment to message and convert message to string
	message.attach(part)
	text = message.as_string()

	# Log in to server using secure context and send email
	context = ssl.create_default_context()
	try:
		with smtplib.SMTP_SSL(smtp_server, port, context = context) as server:
		    server.login(mail_from, mail_password)
		    server.sendmail(mail_from, mail_to, text)
		    print (f"Successfuly sent to '{mail_to}'")
	except:
		f = open(ERR_log,"a")
		f.write(f'Undelivered email to: {mail_to}')
		f.write("\n")
		f.close()
		print (f"Communication failure in '{smtp_server}'")
		pass

att_file = r"C:\python\Blog\TextFSM Custom.JPG" # tên file cần đính kèm

email_list = 'email_list.csv' # tên file lưu trữ thông tin thiết bị
column_name = ['mail_from', 'mail_subject', 'mail_to', 'mail_body', 'mail_password'] # chỉ định các cột cần lấy
try:
	email_list = pd.read_csv(email_list, usecols = column_name, encoding = "utf-8") # đọc và xử lý chuyển dữ liệu về dạng DataFrame, và sử dụng code utf-8
	email_list = email_list.to_dict(orient='records') # chuyển đổi về dict tương ứng (ví dụ: nếu file có 10 dòng thì sẽ tạo ra 9 (10 dòng bỏ đi dòng đầu tiên đã làm key) dictionary tương ứng)
	#pprint(email_list)

	for email_info in email_list:
		email_info["att_file"] = att_file # thêm thông tin att_file vào dict
		send_mail_att(**email_info)
	ERR_info = f"*** ERROR: Please check file : '{ERR_log}' at '{path}' ***\n"
	print (ERR_info)
except:
	ERR_info = f"*** ERROR: Please check file : '{email_list}' at '{path}' ***\n"
	print (ERR_info)
	pass


3. Sử dụng profile hiện của MS Outlook để gửi mail.
import win32com.client
def outlook_send_mail(mail_to, mail_subject, mail_body, att_file):
	"""
 	gọi outlook hiện tại để send mail
	"""
	outlook = win32com.client.Dispatch('outlook.application')
	mail = outlook.CreateItem(0)
	mail.To = rf"{mail_to}"
	mail.Subject = rf"{mail_subject}"
	mail.HTMLBody = '

This is HTML Body

' mail.Body = rf"{mail_body}" mail.Attachments.Add(rf"{att_file}") # mail.Attachments.Add('them file nua.abc') # mail.CC = 'somebody@company.com' mail.Send()


Tham khảo bài gửi mail KHÔNG attach file tại đây.


Xong!

Network Automation #011 - SMTP Sending Emails With Python - Gửi Mail Bằng Python

 YÊU CẦU:

1. Sử dụng thư viện smtplib của python để kết nối đến gmail và gửi mail

2. Gửi mail hàng loạt với thông tin được lưu trữ trong file email_list.csv


THỰC HIỆN

1. Sử dụng thư viện smtplib của python để kết nối đến gmail và gửi mail

Code:
'''
Kết nối đến Gmail để gửi mail

Điều kiện:
1. Tắt bảo mật 2 lớp
https://myaccount.google.com/security?utm_source=OGB&utm_medium=act#signin

2. Allow less secure apps: ON
https://myaccount.google.com/u/1/lesssecureapps?pli=1&pageId=none

nếu không chúng ta sẽ gặp lỗi
#smtplib.SMTPAuthenticationError: (535, b'5.7.8 Username and Password not accepted. Learn more at\n5.7.8  https://support.google.com/mail/?p=BadCredentials qe12sm2115875pjb.29 - gsmtp')

nếu trong nội dung email có gõ tiếng việt sẽ bị lỗi, các địa chỉ không gửi đến được sẽ được lưu vào file
'''
import smtplib, ssl

def send_mail(mail_from, mail_password, mail_to, mail_subject, mail_body): # Hàm gửi mail
	port = 465  # For SSL
	smtp_server = "smtp.gmail.com"
	#mail_password = input("Type your password and press enter: ")
	mail_message = f"Subject: {mail_subject}\n\n{mail_body}"
	context = ssl.create_default_context()
	try:
		with smtplib.SMTP_SSL(smtp_server, port, context = context) as server:
		    server.login(mail_from, mail_password)
		    server.sendmail(mail_from, mail_to, mail_message)
		    print (f"Successfuly sent to '{mail_to}'")
	except:
		print (f"Communication failure in '{smtp_server}'")
            
# Định nghĩa các thông tin 
email_info = {
	"mail_from": "khanhvc.wrk@gmail.com",
	"mail_password": "admin" ,
	"mail_to": "khanhvc@tencongty.com",
	"mail_subject" : "This is send python 3.10" ,
	"mail_body": "This is for testing email",
	#mail_password = input("Type your password and press enter:")
}

send_mail(**email_info)

2. Gửi mail hàng loạt với thông tin được lưu trữ trong file email_list.csv

Tạo file email_list.csv có dạng:


Code:
'''
Kết nối đến Gmail để gửi mail, danh sách các email được lưu trữ trong file email_list.csv

Điều kiện:
1. Tắt bảo mật 2 lớp
https://myaccount.google.com/security?utm_source=OGB&utm_medium=act#signin

2. Allow less secure apps: ON
https://myaccount.google.com/u/1/lesssecureapps?pli=1&pageId=none

nếu không chúng ta sẽ gặp lỗi
#smtplib.SMTPAuthenticationError: (535, b'5.7.8 Username and Password not accepted. Learn more at\n5.7.8  https://support.google.com/mail/?p=BadCredentials qe12sm2115875pjb.29 - gsmtp')
'''
import smtplib, ssl
import pandas as pd
from pprint import pprint
from datetime import datetime
import os

path = os.getcwd()  # lấy đường dẫn hiện tại
now = datetime.now().strftime("%Y-%b-%d_%H%M%S")

ERR_log = f"Send_Mail_{now}_ERR_logs.log" # định nghĩa tên file lưu trữ thông tin lỗi

def send_mail(mail_from, mail_password, mail_to, mail_subject, mail_body):
	port = 465  # For SSL
	smtp_server = "smtp.gmail.com"
	#mail_password = input("Type your password and press enter: ")
	mail_message = f"Subject: {mail_subject}\n\n{mail_body}"
	context = ssl.create_default_context()
	try:
		with smtplib.SMTP_SSL(smtp_server, port, context = context) as server:
		    server.login(mail_from, mail_password)
		    server.sendmail(mail_from, mail_to, mail_message)
		    print (f"Successfuly sent to '{mail_to}'")
	except:
		f = open(ERR_log,"a")
		f.write(f'Undelivered email to: {mail_to}')
		f.write("\n")
		f.close()
		print (f"Communication failure in '{smtp_server}'")
		pass
            
email_list = 'email_list.csv' # tên file lưu trữ thông tin thiết bị
column_name = ['mail_from', 'mail_subject', 'mail_to', 'mail_body', 'mail_password'] # chỉ định các cột cần lấy
try:
	email_list = pd.read_csv(email_list, usecols = column_name, encoding = "utf-8") # đọc và xử lý chuyển dữ liệu về dạng DataFrame, và sử dụng code utf-8
	email_list = email_list.to_dict(orient='records') # chuyển đổi về dict tương ứng (ví dụ: nếu file có 10 dòng thì sẽ tạo ra 9 (10 dòng bỏ đi dòng đầu tiên đã làm key) dictionary tương ứng)
	#pprint(email_list)

	for email_info in email_list:
		send_mail(**email_info)
	ERR_info = f"*** ERROR: Please check file : '{ERR_log}' at '{path}' ***\n"
	print (ERR_info)
except:
	ERR_info = f"*** ERROR: Please check file : '{email_list}' at '{path}' ***\n"
	print (ERR_info)
	pass

Kết quả:


Tham khảo bài gửi mail có đính kèm attach file tại đây


Xong!


Network Automation #010 - Kiểm Tra MAC Address Lạ Gắng Vào Switch

 YÊU CẦU:

Kiểm tra các địa chỉ mac hiện trên switch nếu địa chỉ nào không có trong danh sách các địa chỉ mac đang đăng ký thì lưu thông tin của chúng vào file

THỰC HIỆN:

Chuẩn bị template lưu nội dung file show_mac_address.template:

Value VLAN (\d+)
Value MAC_ADDRESS ([0-9a-fA-F]{4}(?:\.[0-9a-fA-F]{4}){2})
Value INTERFACE ([^,\s]+)

Start
  ^Vlan\s+Mac Address\s+Type\s+Ports -> TYPE1

TYPE1
  ^\s*${VLAN}\s+${MAC_ADDRESS}\s+\w+\s+${INTERFACE}(?:\s|$$) -> Record


Code:

'''
- Kết nối switch kiểm tra các địa chỉ mac hiện trên switch nếu địa chỉ nào không có trong danh sách các địa chỉ mac đã đăng ký thì lưu thông tin của chúng vào file

- Câu lệnh sử dụng trong bài:
  show mac address-table

- Thư viện cần cài:
+ pip install textfsm
+ pip install pandas

'''

import pandas as pd # dùng khi ghi file csv 
from pprint import pprint # dùng để in ra đẹp, dễ nhìn hơn
import textfsm
from netmiko import ConnectHandler
import os

path = os.getcwd()	# lấy đường dẫn hiện tại

show_mac_01 = pd.read_csv('mac_store.csv', encoding = "utf-8") # đọc và xử lý chuyển dữ liệu về dạng DataFrame, và sử dụng code utf-8, lấy tất cả các cột hiện có
column_name = 'MAC_ADDRESS' # tên của cột phải tồn tại trong file mac_store.csv
mac_store = show_mac_01.values.tolist() # Trích lọc cột MAC_ADDRESS
mac_store = show_mac_01[column_name].values.tolist() 
#pprint(mac_store)

Sw_1 = { 
	"host":"192.168.100.23",
	"username":"admin",
	"password":"l2Hsv-Tw!!)",
	"device_type":"cisco_ios"
	}


print("Connecting to a host: " + Sw_1["host"] + "...\n") # Hiển thị thông báo kết nối tới
# dùng hàm ConnectHandler trong thư viện netmiko để kết nối với Sw_1 với các thông tin đã định nghĩa trong dictionnary
net_connect = ConnectHandler(**Sw_1) 
print("Connected successfully")

sh_mac_addr = "show mac address-table"
sh_mac_addr = net_connect.send_command(sh_mac_addr) # thực hiện lênh show arp với chính IP cần tìm

with open('show_mac_address.template') as template: # Mở file show_mac_address.template vừa định nghĩa
    fsm = textfsm.TextFSM(template)
    sh_mac_addr = fsm.ParseText(sh_mac_addr)
'''
for item in sh_mac_addr :
    if item[1] not in mac_store:
        print(item)
    else: print ("x")
'''
# lấy cụm thứ 2 (là địa chỉ MAC) và kiểm tra nếu chúng không có trong có trong file mac_store.csv thì đưa vào biến mac_diff
mac_diff = [item for item in sh_mac_addr if item[1] not in mac_store] 

file_name = f"MAC_diff_{Sw_1['host']}.csv"
df = pd.DataFrame(mac_diff) # convert dữ liệu sang kiểu DataFrame
df.to_csv(file_name, header = fsm.header, index = False) # thực hiện lưu các địa chỉ mac khác nhau vào file
print (f"Cac dia chi MAC chua dang ky duoc luu vao '{file_name}' tai '{path}'")

Tham khảo bài export MAC Address trong switch tại đây

Xong!

Network Automation #009 - Exporting MAC Address From Switches Cisco IOS & TextFSM Template

 YÊU CẦU:

1. Sử dụng thư viện netmiko kết nối vào switch kết hợp với TextFSM template để export toàn bộ MAC Address và lưu vào file MAC_TextFSM_template.CSV

2. Định nghĩa TextFSM template chỉ lấy các trường: Vlan (chỉ lấy các vlan là số), Mac Address, Port là lưu thành vào file MAC_TextFSM_Custom.CSV


THỰC HIỆN:

1. Sử dụng thư viện netmiko kết nối vào switch kết hợp với TextFSM template để export toàn bộ MAC Address và lưu vào file MAC_TextFSM_template.CSV

  • Chuẩn bị:
Cài đặt thư viện:
- pip install textfsm
- pip install pandas

Tham khảo cách cài đặt thư viện tại đây

  • Code:

'''
- Kết nối switch export tất cả các MAC Address và lưu thành file MAC_TextFSM_template.CSV

- Câu lệnh sử dụng trong bài:
+ show mac address-table

- Thư viện cần cài:
+ pip install textfsm
+ pip install pandas

'''
from netmiko import ConnectHandler
import textfsm
import pandas as pd
import os

path = os.getcwd()	# lấy đường dẫn hiện tại
file_name = "MAC_TextFSM_template.CSV" # tên file cần lưu

# Thông tin thiết bị cần SSH vào (định nghĩa dictionnary)
Sw_1 = { 
	"host":"192.168.100.23",
	"username":"admin",
	"password":"admin1234",
	"device_type":"cisco_ios"
	}
	
print("Dang ket noi den thiet bi co IP: " + Sw_1["host"] + "...\n") # Hiển thị thông báo kết nối tới
# dùng hàm ConnectHandler trong thư viện netmiko để kết nối với Sw_1 với các thông tin đã định nghĩa trong dictionnary
net_connect = ConnectHandler(**Sw_1) 
print("Ket noi thanh cong!")

sh_mac_addr = "show mac address-table"
sh_mac_addr = net_connect.send_command(sh_mac_addr, use_textfsm = True) # thực hiện lệnh và sử dụng thư viện TextFSM
df = pd.DataFrame(sh_mac_addr) # chuyển dữ liệu thành dạng DataFrame
df.to_csv(file_name, index = False) # thực hiện lưu file nhưng không lưu cột index
print (f"\n=====Tat ca MAC Address duoc luu vao file '{file_name}' tai '{path}'=====")


  • Kết Quả:

Dang ket noi den thiet bi co IP: 192.168.100.23...
Ket noi thanh cong!
=====Tat ca MAC Address duoc luu o file 'MAC_TextFSM_template.CSV' tai 'C:\python'=====
[Finished in 3.3s]


Nhận xét:
Khi sử dụng TextFSM để xử lý cột Mac Address đổi thành destination_address, và Ports đổi thành destination_port chúng ta khó có thể để chỉnh được theo ý.

2. Định nghĩa TextFSM template chỉ lấy các trường: Vlan (chỉ lấy các vlan là số), Mac Address, Port là lưu thành vào file MAC_TextFSM_Custom.CSV

  • Định nghĩa TextFSM Template lưu nội dung vào file show_mac_address.template
Value VLAN (\d+)
Value MAC_ADDRESS ([0-9a-fA-F]{4}(?:\.[0-9a-fA-F]{4}){2})
Value INTERFACE ([^,\s]+)

Start
  ^Vlan\s+Mac Address\s+Type\s+Ports -> TYPE1

TYPE1
  ^\s*${VLAN}\s+${MAC_ADDRESS}\s+\w+\s+${INTERFACE}(?:\s|$$) -> Record


Tham khảo TextFSM template tại đây

  • Code:

'''
- Kết nối switch export tất cả các MAC Address và lưu thành file MAC_TextFSM_Custom.CSV
- Chúng ta tự định nghĩa TextFSM template, các cột tiêu đề chúng ta cũng có thể đặt tên tùy thích và cũng có thể chọn ra/định nghĩa các vlan cần lấy ra trong file đó.

- Câu lệnh sử dụng trong bài:
+ show mac address-table

- Thư viện cần cài:
+ pip install textfsm
+ pip install pandas

'''
from netmiko import ConnectHandler
import textfsm
import pandas as pd
import os

path = os.getcwd()	# lấy đường dẫn hiện tại
file_name = "MAC_TextFSM_Custom.CSV" # tên file cần lưu
textfsm_template = 'show_mac_address.template' # tên template
# Thông tin thiết bị cần SSH vào (định nghĩa dictionnary)
Sw_1 = { 
	"host":"192.168.100.23",
	"username":"admin",
	"password":"admin1234",
	"device_type":"cisco_ios"
	}
	
print("Dang ket noi den thiet bi co IP: " + Sw_1["host"] + "...\n") # Hiển thị thông báo kết nối tới
# dùng hàm ConnectHandler trong thư viện netmiko để kết nối với Sw_1 với các thông tin đã định nghĩa trong dictionnary
net_connect = ConnectHandler(**Sw_1) 
print("Ket noi thanh cong!")

sh_mac_addr = "show mac address-table"
sh_mac_addr = net_connect.send_command(sh_mac_addr) # thực hiện lệnh show
try:
	with open(textfsm_template) as template: # Mở file show_mac_address.template vừa định nghĩa
		fsm = textfsm.TextFSM(template)
		sh_mac_addr = fsm.ParseText(sh_mac_addr)
	#print(fsm.header)
	#pprint(sh_mac_addr)
	df = pd.DataFrame(sh_mac_addr) # convert dữ liệu sang kiểu DataFrame
	df.to_csv(file_name, header = fsm.header, index = False) # Ghi dữ liệu vừa trích lọc vào file với header tương ứng và không cần điền thêm cột index	
	print (f"\n=====Tat ca MAC Address duoc luu vao file '{file_name}' tai '{path}'=====")
except:
	print (f"\n=====Kiem tra file template '{textfsm_template}' tai '{path}'=====")	


  • Kết quả:


Nhận xét:
Việc tự định nghĩa template chúng ta có thể tùy chọn các trường cần lấy và phần tiêu đề của các cột chúng ta có thể đặt tên tùy thích. Với kết quả trên chúng ta thấy trường Type và các dòng vlan không phải là số sẽ không được đưa vào file MAC_TextFSM_Custom.csv


Xong!


Học Python Qua Ví Dụ #026 - Pandas DataFrame & Đọc CSV File

 YÊU CẦU:

1. Dùng panda để đọc file device_list.csv với các yêu cầu:
- Hiển thị tất cả dữ liệu hiện có trong file
- Lọc và chỉ định các cột muốn đọc ('username', 'password','host','device_type') và chuyển đổi thành Dictionnary
- Chỉ đọc 5 dòng đầu tiên
- Không đọc các dòng thứ nhất, thứ 5 và thứ 6
- Chỉ đọc dòng đầu tiên và chuyển dòng này thành List

2. Dùng panda để đọc file show_mac_address.csv trích lọc cột 'MAC_ADDRESS' và chuyển từng dòng giá trị sang List


THỰC HIỆN

1. Dùng panda để đọc file .csv với các yêu cầu:
- Hiển thị tất cả dữ liệu hiện có trong file
- Lọc và chỉ định các cột muốn đọc ('username', 'password','host','device_type') và chuyển đổi thành Dictionnary
- Chỉ đọc 5 dòng đầu tiên
- Không đọc các dòng thứ nhất, thứ 5 và thứ 6
- Chỉ đọc dòng đầu tiên và chuyển dòng này thành List

Code:

import pandas as pd # dùng khi ghi file csv 
from pprint import pprint # dùng để in ra đẹp, dễ nhìn hơn

device_info = pd.read_csv('device_list.csv', encoding = "utf-8") # đọc và xử lý chuyển dữ liệu về dạng DataFrame, và sử dụng code utf-8, lấy tất cả các cột hiện có
pprint(device_info)

'''
orient str {‘dict’, ‘list’, ‘series’, ‘split’, ‘records’, ‘index’}

‘dict’ (default) : dict like {column -> {index -> value}}
‘list’ : dict like {column -> [values]}
‘series’ : dict like {column -> Series(values)}
‘split’ : dict like {‘index’ -> [index], ‘columns’ -> [columns], ‘data’ -> [values]}
‘records’ : list like [{column -> value}, … , {column -> value}]
‘index’ : dict like {index -> {column -> value}}
'''
column_name = ['username', 'password','host','device_type'] # chỉ định các cột cần lấy
device_info = pd.read_csv('device_list.csv', usecols = column_name, encoding = "utf-8") # đọc và xử lý chuyển dữ liệu về dạng DataFrame, và sử dụng code utf-8
device_info = device_info.to_dict(orient='records') # chuyển đổi về dict tương ứng (ví dụ: nếu file có 10 dòng thì sẽ tạo ra 9 (10 dòng bỏ đi dòng đầu tiên đã làm key) dictionary tương ứng)
pprint(device_info)

device_info = pd.read_csv('device_list.csv', nrows=5) # đọc 5 dòng đầu tiên
pprint(device_info)

device_info = pd.read_csv('device_list.csv', skiprows=[0,5,6]) # KHÔNG ĐỌC các dòng thứ nhất, thứ 5, thứ 6
pprint(device_info)

device_info = pd.read_csv('device_list.csv', nrows=0).columns.tolist() # chỉ lấy 1 dòng đầu tiên 
pprint(device_info) 


2. Dùng panda để đọc file show_mac_address.csv trích lọc cột 'MAC_ADDRESS' và chuyển từng dòng giá trị sang List

import pandas as pd # dùng khi ghi file csv 
from pprint import pprint # dùng để in ra đẹp, dễ nhìn hơn

show_mac_address = pd.read_csv('show_mac_address.csv', encoding = "utf-8") # đọc và xử lý chuyển dữ liệu về dạng DataFrame, và sử dụng code utf-8, lấy tất cả các cột hiện có
column_name = ['MAC_ADDRESS']
show_mac_address = show_mac_address[column_name].values.tolist() # Trích lọc cột MAC_ADDRESS
pprint (show_mac_address)

Tham khảo convert panda to list
Tham khảo convert panda to dict

Xong!

Học Python Qua Ví Dụ #025 - TextFSM, Pandas DataFrame & Ghi CSV File

 YÊU CẦU:

1. Trích lọc lấy các cột dữ liệu Address và Hardware Addr trong khối dữ liệu thô lấy được từ kết quả show arp

2. Trích lọc lấy cột VLAN và MAC_ADDRESS trong khối dữ liệu thô từ kết quả show mac address-table, nhưng chỉ lấy các vlan 101 -> 104 và vlan 107 -> 108. Kết quả trích lọc sẽ được lưu vào file theo định dạng CSV


THỰC HIỆN:

1. Trích lọc lấy các cột dữ liệu Address và Hardware Addr trong khối dữ liệu thô lấy được từ kết quả show arp.

Nhận xét:
Có rất nhi ều cách xử lý để lấy ra được dữ liệu theo yêu cầu. Tuy nhiên hôm nay chúng tôi giới thiệu các bạn sử dụng TextFSM kết hợp với Regular Expression

a. Định nghĩa/tạo file show_arp.template (file này được lưu thư mục chứa file Demo.py) với các dạng: IP Address và Hardward Addr (MAC)

Value MAC_ADDRESS ([a-fA-F0-9]{4}\.[a-fA-F0-9]{4}\.[a-fA-F0-9]{4}) 
Value IP_ADDRESS (\d{1,3}\.\d{1,3}\.\d{1,3}\.\d{1,3})

Start 
  ^Internet\s+${IP_ADDRESS}\s+(\d+|\-)\s+${MAC_ADDRESS}\s+ -> Record 

Giải thích:
* Hàng 1:
- MAC_ADDRESS: tên của biến
- ([a-fA-F0-9]{4}\.[a-fA-F0-9]{4}\.[a-fA-F0-9]{4}): Giá trị của địa chỉ MAC có dạng (Regular Expression sẽ thực hiện lọc ra nếu thỏa điều kiện)

Hàng 2:
- Value IP_ADDRESS: tên của biến
- (\d{1,3}\.\d{1,3}\.\d{1,3}\.\d{1,3}): Giá trị của địa chỉ IPv4 có dạng

Hàng 3:
Là dòng trắng(bắt buộc phải có dòng trắng này)

Hàng 4:
Start

Hàng 5:
2 khoảng trắng, dấu "^" chuỗi được bắt đầu bởi <nội dung định nghĩa của regular expression> -> Record: Báo hiệu kết thúc và thực hiện

-Ý nghĩa dòng RegEx "^Internet\s+${IP_ADDRESS}\s+(\d+|\-)\s+${MAC_ADDRESS}\s+":
Bắt đầu là chuỗi Internet, là khoảng trắng có thể xuất hiện 1 hoặc nhiều lầnđịnh dạng của địa chỉ IP_ADDRESS được định nghĩa (vlaue IP_ADDRESS), là khoảng trắng có thể xuất hiện 1 hoặc nhiều lần, có thể là số xuất hiện 1 hoặc nhiều lần HOẶC là ký tự "_", là khoảng trắng có thể xuất hiện 1 hoặc nhiều lần, định dạng của địa chỉ MAC_ADDRESS, là khoảng trắng xuất hiện 1 hoặc nhiều lần

Các bạn có thể tìm hiểu thêm về Regular Expression tại đây


b. Code (Demo.py):

import textfsm
from pprint import pprint # dùng để in ra đẹp, dễ nhìn hơn

show_arp = '''Building-1_Factory-1_2960_24#show arp
Protocol  Address          Age (min)  Hardware Addr   Type   Interface
Internet  192.168.100.7           6   00d7.8f0d.b83f  ARPA   Vlan1
Internet  192.168.100.11          -   08cc.a7dd.e440  ARPA   Vlan1
Internet  192.168.100.32         56   3087.d91e.1c50  ARPA   Vlan1
Internet  192.168.100.35         65   f8e7.1e34.31d0  ARPA   Vlan1
Internet  192.168.100.51         65   348f.2712.aa80  ARPA   Vlan1
Internet  192.168.100.61         65   8423.8805.8370  ARPA   Vlan1
Internet  192.168.100.62         65   c803.f53a.ccf0  ARPA   Vlan1
Internet  192.168.100.63         65   c803.f50c.4a50  ARPA   Vlan1
Internet  192.168.100.65         65   4cb1.cd3c.1af0  ARPA   Vlan1
Internet  192.168.100.66         65   4cb1.cd3b.cd30  ARPA   Vlan1
Internet  192.168.100.179        10   f28c.d229.b87b  ARPA   Vlan1
Internet  192.168.116.15         73   00d7.8f0d.b83f  ARPA   Vlan1
Internet  192.168.116.37        142   00d7.8f0d.b83f  ARPA   Vlan1
'''

with open('show_arp.template') as template: # Mở file show_arp.template vừa định nghĩa
    fsm = textfsm.TextFSM(template)
    show_arp = fsm.ParseText(show_arp)

print(fsm.header) # in ra tên các biến được định nghĩa trong file show_arp.template
pprint(show_arp) # Kết quả trích lọc/lấy được thỏa điều kiện Regular Expression

Kết quả:

['MAC_ADDRESS', 'IP_ADDRESS']
[['00d7.8f0d.b83f', '192.168.100.7'],
 ['08cc.a7dd.e440', '192.168.100.11'],
 ['3087.d91e.1c50', '192.168.100.32'],
 ['f8e7.1e34.31d0', '192.168.100.35'],
 ['348f.2712.aa80', '192.168.100.51'],
 ['8423.8805.8370', '192.168.100.61'],
 ['c803.f53a.ccf0', '192.168.100.62'],
 ['c803.f50c.4a50', '192.168.100.63'],
 ['4cb1.cd3c.1af0', '192.168.100.65'],
 ['4cb1.cd3b.cd30', '192.168.100.66'],
 ['f28c.d229.b87b', '192.168.100.179'],
 ['00d7.8f0d.b83f', '192.168.116.15'],
 ['00d7.8f0d.b83f', '192.168.116.37']]
[Finished in 0.1s]

2. Trích lọc lấy cột VLAN và MAC_ADDRESS trong khối dữ liệu thô từ kết quả show mac address-table, nhưng chỉ lấy các vlan 101 -> 104 và vlan 107 -> 108. Kết quả trích lọc sẽ được lưu vào file theo định dạng CSV

a. Tạo file teamplate show_mac_address.template:

Value VLAN ([1][0]([1-4]|[7-8]))
Value MAC_ADDRESS ([0-9a-fA-F]{4}(?:\.[0-9a-fA-F]{4}){2})

Start
  ^Vlan\s+Mac Address\s+Type\s+Ports -> TYPE1

TYPE1
  ^\s*${VLAN}\s+${MAC_ADDRESS}\s+ -> Record

Giải thích:
Kết quả trả về có thể có nhiều dạng khác nhau, tùy mỗi dạng mà chúng ta xử lý/lấy/trích lọc phù hợp với yêu cầu. Ở đây chúng ta xét nếu chúng trả về dạng: ^Vlan\s+Mac Address\s+Type\s+Ports thì nhảy đến TYPE1 để thực hiện trích lọc. (chú ý phải có dòng trắng số 3, và dòng trắng số 6)

b. Code:

import textfsm
import pandas as pd # dùng khi ghi file csv 
from pprint import pprint # dùng để in ra đẹp, dễ nhìn hơn

show_mac_address = '''Building-1_Factory-1_2960_24#show mac address-table
          Mac Address Table
-------------------------------------------

Vlan    Mac Address       Type        Ports
----    -----------       --------    -----
 All    0100.0ccc.cccc    STATIC      CPU
 All    0100.0ccc.cccd    STATIC      CPU
 All    0180.c200.0000    STATIC      CPU
 All    0180.c200.0001    STATIC      CPU
 All    0180.c200.0002    STATIC      CPU
 All    0180.c200.000d    STATIC      CPU
 All    0180.c200.000e    STATIC      CPU
 All    0180.c200.000f    STATIC      CPU
 All    0180.c200.0010    STATIC      CPU
 All    ffff.ffff.ffff    STATIC      CPU
 100    0000.7d30.b3b7    DYNAMIC     Gi0/1
 100    0000.7d30.b3c2    DYNAMIC     Fa0/23
 101    0002.6510.92d3    DYNAMIC     Fa0/23
 101    0002.6510.b148    DYNAMIC     Fa0/23
 101    0002.6510.befe    DYNAMIC     Fa0/23
 101    0002.6512.8a34    DYNAMIC     Fa0/23
 102    0002.6513.c157    DYNAMIC     Fa0/23
 102    0002.6513.fd5f    DYNAMIC     Fa0/23
 102    0002.6513.fd62    DYNAMIC     Fa0/23
 102    0002.6513.fdbd    DYNAMIC     Fa0/23
 103    0002.6513.fe26    DYNAMIC     Fa0/23
 103    0002.6514.5de5    DYNAMIC     Fa0/23
 108    0002.6516.793e    DYNAMIC     Fa0/23
 103    0016.e637.f51f    DYNAMIC     Gi0/1
 104    001d.9291.71cb    DYNAMIC     Fa0/23
 113    accb.51d5.2d3d    DYNAMIC     Gi0/1
 113    accb.51f5.4e4e    DYNAMIC     Gi0/1
 115    b4a3.82c4.374a    DYNAMIC     Gi0/1
 109    c051.7ef3.c089    DYNAMIC     Gi0/1
 109    c051.7ef3.c214    DYNAMIC     Gi0/1
 108    001e.8ccd.f971    DYNAMIC     Gi0/1
 100    0024.1db9.ab37    DYNAMIC     Gi0/1
 101    006c.bcb2.5e9d    DYNAMIC     Gi0/1
 101    d027.88bd.4b80    DYNAMIC     Gi0/1
 102    e0d5.5e17.5c5c    DYNAMIC     Gi0/1
 100    eca8.6b77.808a    DYNAMIC     Gi0/1
 101    0000.7d30.b3ba    DYNAMIC     Gi0/1
 104    001b.fc9f.af1c    DYNAMIC     Gi0/1
 101    001f.d018.26e1    DYNAMIC     Gi0/1
 101    001f.d0c1.71f8    DYNAMIC     Gi0/1
 102    bc5f.f47d.cad6    DYNAMIC     Gi0/1
 110    f003.8c8e.b2cd    DYNAMIC     Gi0/1
 110    f003.8c8e.b2d1    DYNAMIC     Gi0/1
 110    f003.8c8e.b2f3    DYNAMIC     Gi0/1
 112    00d7.8f0d.b83f    DYNAMIC     Gi0/1
 112    04b4.290a.2ad1    DYNAMIC     Gi0/1
 105    04d6.aad0.3772    DYNAMIC     Gi0/1
 112    0c2f.b065.e65c    DYNAMIC     Fa0/1
 112    1881.0e21.f5ff    DYNAMIC     Gi0/1
   1    1887.407b.444d    DYNAMIC     Gi0/1
 112    2047.da27.a341    DYNAMIC     Gi0/1
 112    20a2.e416.c350    DYNAMIC     Gi0/1
 113    e0c3.7709.5c28    DYNAMIC     Gi0/1
 113    e493.6a45.0717    DYNAMIC     Gi0/1
 113    ec51.bc56.cced    DYNAMIC     Gi0/1
   1    f0db.e2ba.c6c6    DYNAMIC     Gi0/1
 113    f8da.0c82.844f    DYNAMIC     Gi0/1
 107    f8e6.1a10.79f6    DYNAMIC     Gi0/1
 107    286f.7ff2.34e0    DYNAMIC     Gi0/1
 106    0017.c498.c864    DYNAMIC     Gi0/1
 106    0095.697f.49e8    DYNAMIC     Gi0/1
 116    00d7.8f0d.b83f    DYNAMIC     Gi0/1
   1    04d6.aa5b.9e4c    DYNAMIC     Gi0/1
   1    04d6.aade.dd3b    DYNAMIC     Gi0/1
   1    08e6.89ab.13a5    DYNAMIC     Gi0/1
'''

with open('show_mac_address.template') as template: # Mở file show_mac_address.template vừa định nghĩa
    fsm = textfsm.TextFSM(template)
    show_mac_address = fsm.ParseText(show_mac_address)

#print(fsm.header)
#pprint(show_mac_address)

df = pd.DataFrame(show_mac_address) # convert dữ liệu sang kiểu DataFrame
df.to_csv("show_mac_address.csv", header = fsm.header, index = False) # Ghi dữ liệu vừa trích lọc vào file với header tương ứng và không cần điền thêm cột index
  
Kết quả file show_mac_address.csv có dạng

Xong!


/*header slide*/